This post is intended for hobby farmers who raise a few hogs to sell as Youth Fair projects and/or as pork processed at small local meat plants. While hobby farmer’s relatively young market-hogs may well be hard to sell as freezer pork, the occasional few culled breeding sows are normally hard to get a decent salvage value out of. And, that’s after transporting them to a sometimes distant stockyard. There is the option of having sows made into sausage at small packinghouse, but now a day most such establishments tend to be over-booked (long waiting times) and expensive. Further, custom-exempt meat plants (those that can only process meat for the personal use of the livestock owner) are not State or Federally Meat Inspected; so their meat products cannot legally be offered for sale to the general public. Every package at custom exempt plants is stamped ” Not For Sale.”
Everyone has heard some of the commercial makers of fresh one pound breakfast sausage chubs advertise that their product is a “Whole Hog” sausage. That statement is true, but the sausage referred to in such ads is produced from whole sow carcasses; not the 6 month old market hogs that most people tend to think of. Still, sows do make excellent sausage. On the other hand, meat from boars (intact male hogs) is highly likely to contain objectionable “boar taint” odor and flavor. Boar taint is described as a perspiration/urine and fecal like odor/flavor in pork from intact males. True boar (not boar as in the any sex class “wild boar”), meat has to be spread out in thousands of pounds of sow meat and/or market hog trimmings; to dilute likely off-flavors. A few sows, and even some market hogs can display boar taint, but in commercial settings boar taint is not an expected finished product quality issue because of the practice of pre-blending trimmings from many different pork carcasses into large final batches. Unfortunately, boar taint is an occasional big problem for small plant or home processed pork products; that comes from non-boars. In those small-scale two cases, all the pork usually originates from from one or two animals. So, if one of your freezer pork animals unexpectedly displays boar taint, you’re going to be tasting a lot of it. But, boar taint is a rare occurrence in non-boar pork carcasses. So, don’t let that stop you from harvesting your own sows. Using the harvest method covered here, it took about 1 hour to dress each sow.
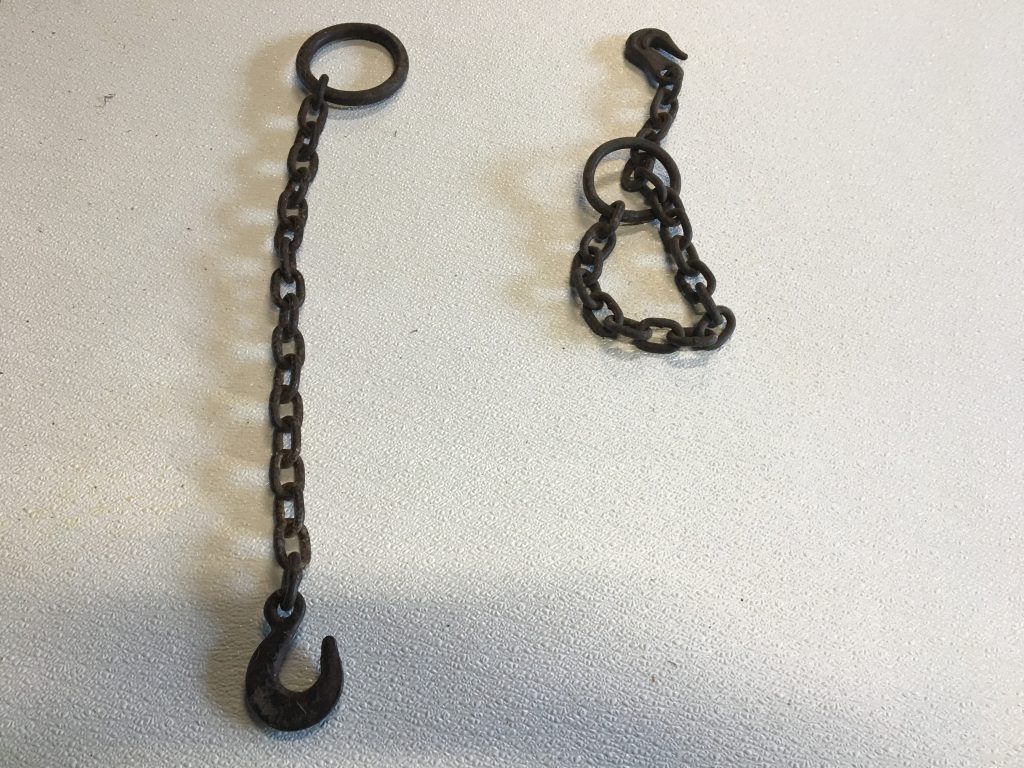
A hog shackle or two is a great tool for home livestock processing. I got these old ones inexpensively many years ago at a going out of business auction.
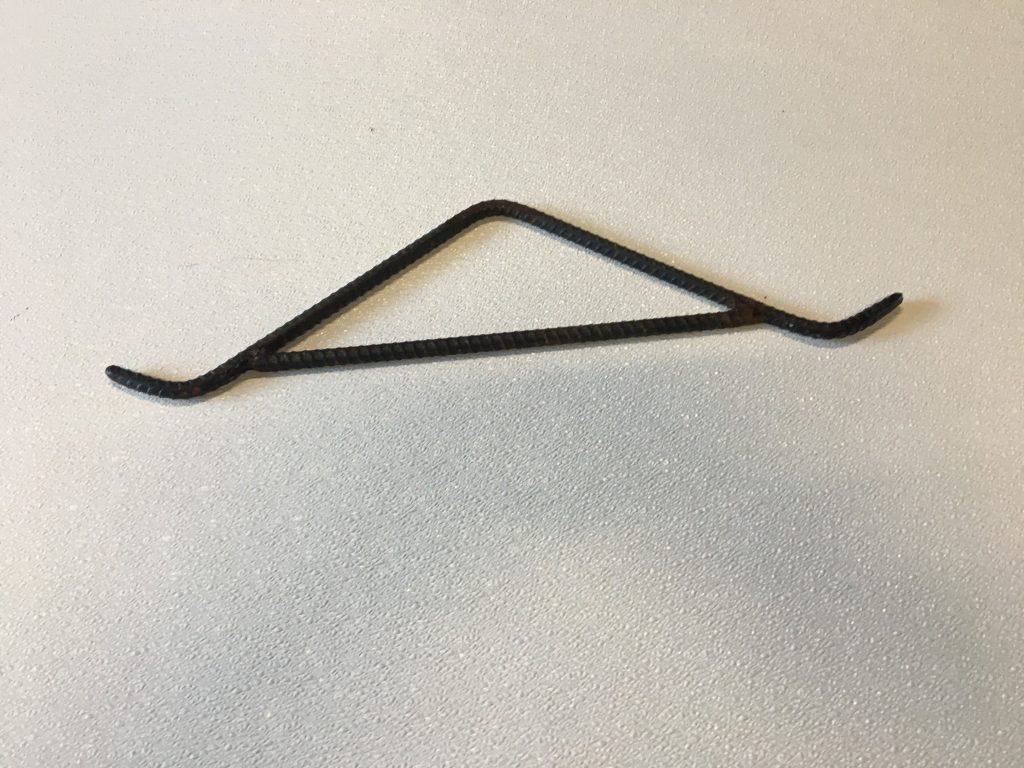
A gambrile is great for suspending hogs during carcass dressing. This one is homemade from rebar. We watch closely for weld breakage or the bending of the malleable steel. We also cut as much hog weight off as we can before fully suspending the carcass from the gambrile. One can buy a commercially made stainless-steel gambrile for as low as $40.
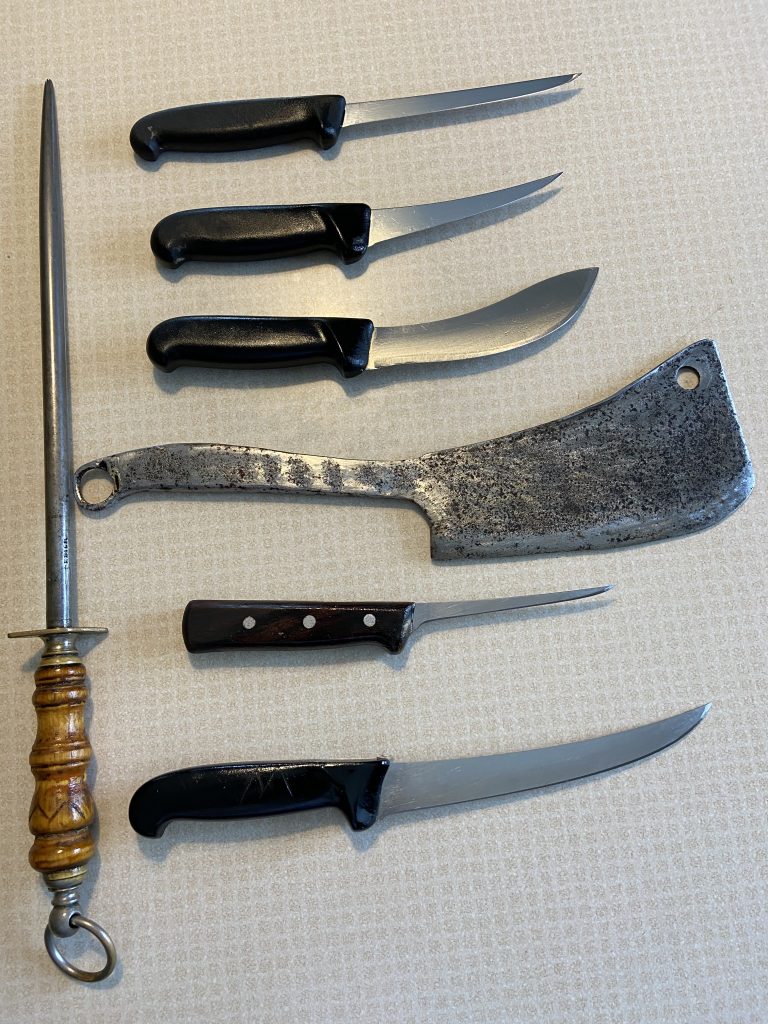
On the left is a 14″ butcher’s steel. It is a sanded smooth steel; just like what the old-timers preferred to use with their pork cutting knives. The top knife is a 6″ ridged, straight boning knife that is good for hog sticking and bunging. Second is a 5″ ridged, curved boning knife; that’s used for some skinning and gut removal. Third is a 6″ skinning knife; that’s used to skin-out the sow sides and back, Forth is an old carcass splitter to be used on the aitchbone. Fifth is a 5″ ridged, narrow blade, straight boner; that’s used to bone-out tight areas like neck and aitch bones. The bottom knife is an 8″ breaking knife; that is good for cutting meat into strips so it can easily be fed through a meat grinder. The bottom two knives are not needed during the sow dressing process.
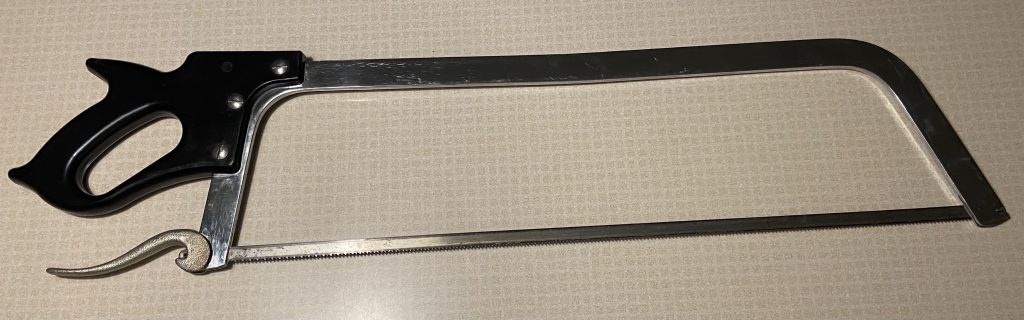
This 25″ stainless steel meat hand saw can be used for leg and head removal, and is needed to split the dressed sow carcass into sides. Once the sides are well-chilled, this saw is used to break the sides into primal cuts.
Warm weather conditions should stop you from home harvesting your own hogs. In the northern parts of the U.S. home hog harvest is wisely limited to the winter months. Temperatures in the 30’s F range during the day time and high 20’s at night are ideal for harvest, chilling and processing. In warmer climates, one would be well advised to have a walk-in cooler on-site before attempting home hog harvest. Most bacterial life begins at 40F. And, bone-sour can occur if thick muscle carcass regions take too long to thoroughly chill through.
The following paragraph was copied from the 14 edition of The Meat We Eat textbook, page 135.
“Fast (Drift) Prior To Harvest
Hogs should be held off feed for 16 to 24 hours prior to harvest to assure completeness of bleeding and to ease evisceration. Furthermore, a time of fasting will reduce the carbohydrates available for postmortem conversion to lactic acid, resulting in higher ultimate pH, a more desirable muscle color and increased water binding capacity; thus improved pork quality.”
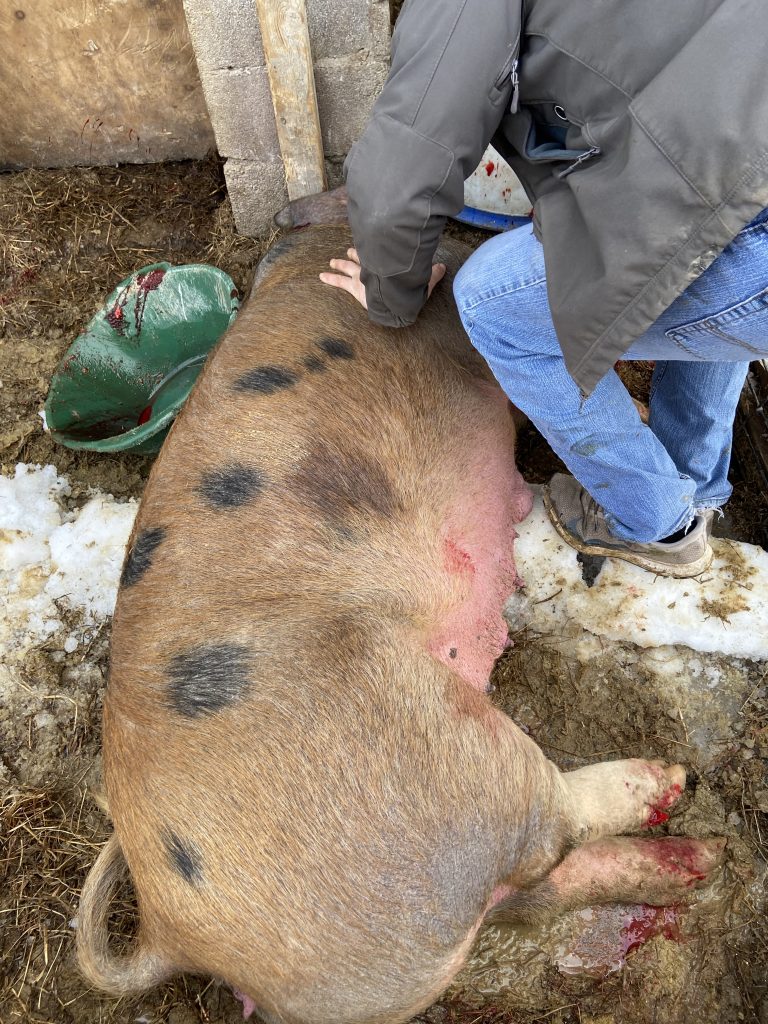
Home harvest is limited to the mechanical stunning (immobilization) of hogs. For both the safety of humans and the humane slaughter of hogs, the hogs must be restrained. A small confinement pen with a sturdy squeeze gate is sufficient. The bigger the hog, the more substantial the restraint system will need to be.
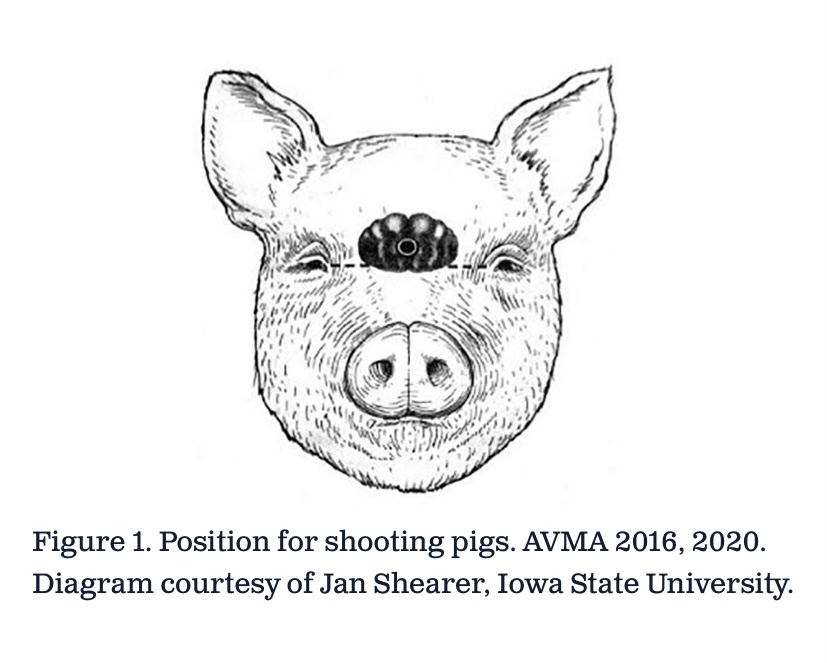
A well placed 22 magnum or 410 pumpkin ball/deer slug should be sufficient for a clean one shot market hog drop. However, with big sows a shogun bigger than a 410 can help assure a humane kill. Also, a behind the ear shot aimed at the opposite-side eye will pass directly through the hogs brain. Long guns are preferred over pistols because it’s easier to get the angle correct for easily popping through the skull. While I’m not certain, I think that a long gun might provide more bullet velocity coming out of the muzzle.
Immediately sticking (bleeding out) a dropped hog in a prone position is a best practice. The time interval between stunning and sticking should be minimized to prevent blood splashes (capillary rupture) in the muscle. This is the case because with mechanical stunning the heart continues to pump for a while; causing blood pressure to go sky high. Electrical stunning, on the other hand, causes cardiac arrest and a slower stick will not then cause any meat quality issues. Side-Note: In 1978 I did a College Summer Internship at a small hog processing plant that used electrical stunning. 6 to 8 market hogs would be ran into a small pen at a time and a V-shaped stunner was place behind their ears then activated. There was a lot of chasing around of hogs and they would sometimes bite at my rubberized apron. Hogs can’t turn their head sideways; so as long as I stayed vertical they could not get a good bite on me. One day a big sow came through and the kill-floor foreman came over and told me to hold the stunner on her until I smelled smoke. The sow stayed rigid until we smelled smoke, then I let off the button and she hit the floor.
A straight, rigid boning knife makes a good pig sticker. However, for large sows a knife of 7 inches is preferable. I have seen a 6″ long knife used on big sows, but it had to be pushed in far; until the tip reached the hog’s backbone. Cut in just anterior to the breast bone and thrust the sticking knife towards the tail. Make sure to stay on center so you don’t end up with a shoulder stick. Shoulder sticks cause less blood removal from the meat and the animal to dies much slower. When the carotid arteries and jugular vein are severed, blood will rapidly gush out.
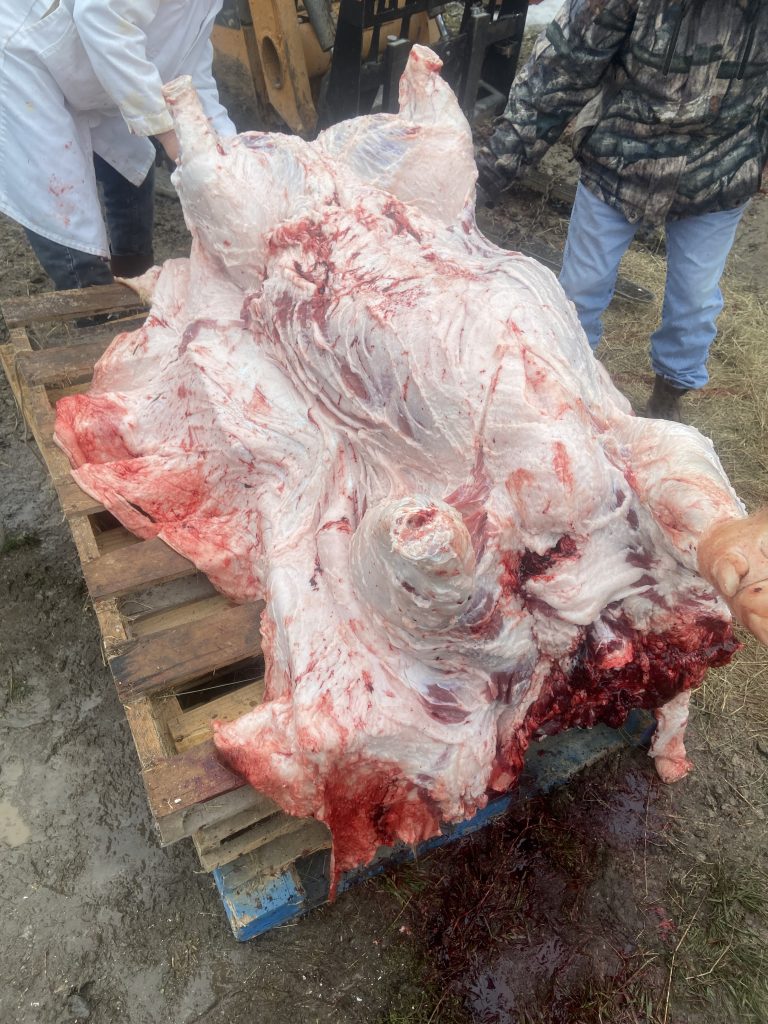
A hog shackle is needed to easily transport a stunned and stuck sow to the makeshift skinning cradle. It is a good practice to hose off any heavy dirt, manure etc., prior to placing the sow on the skinning cradle.
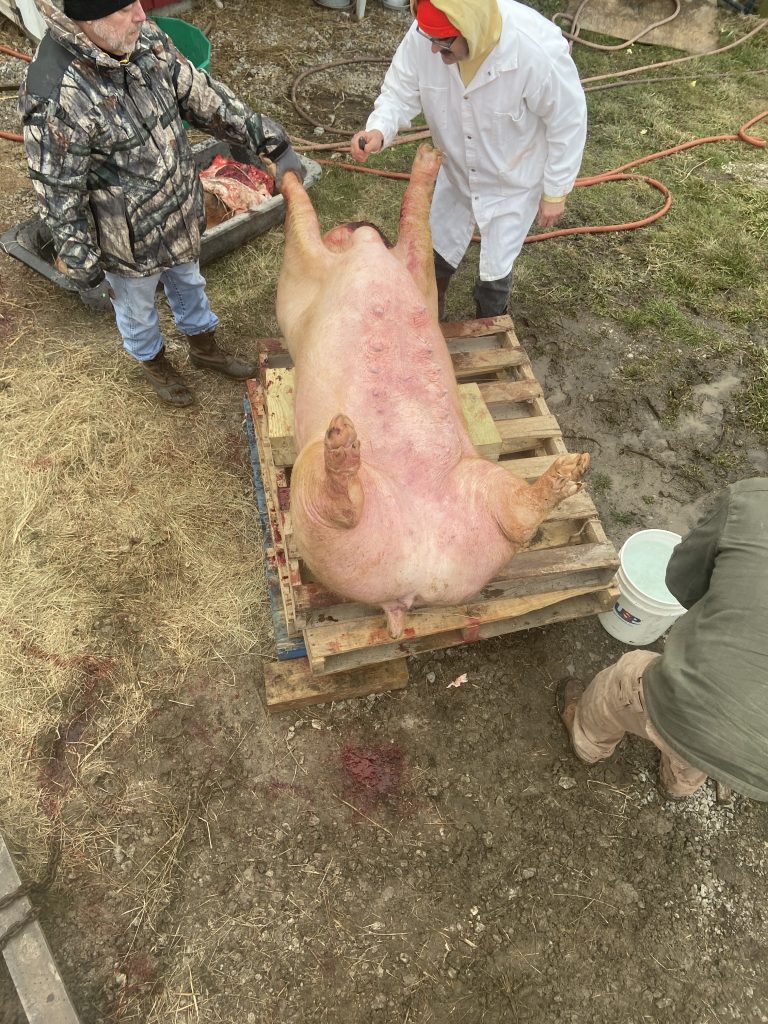
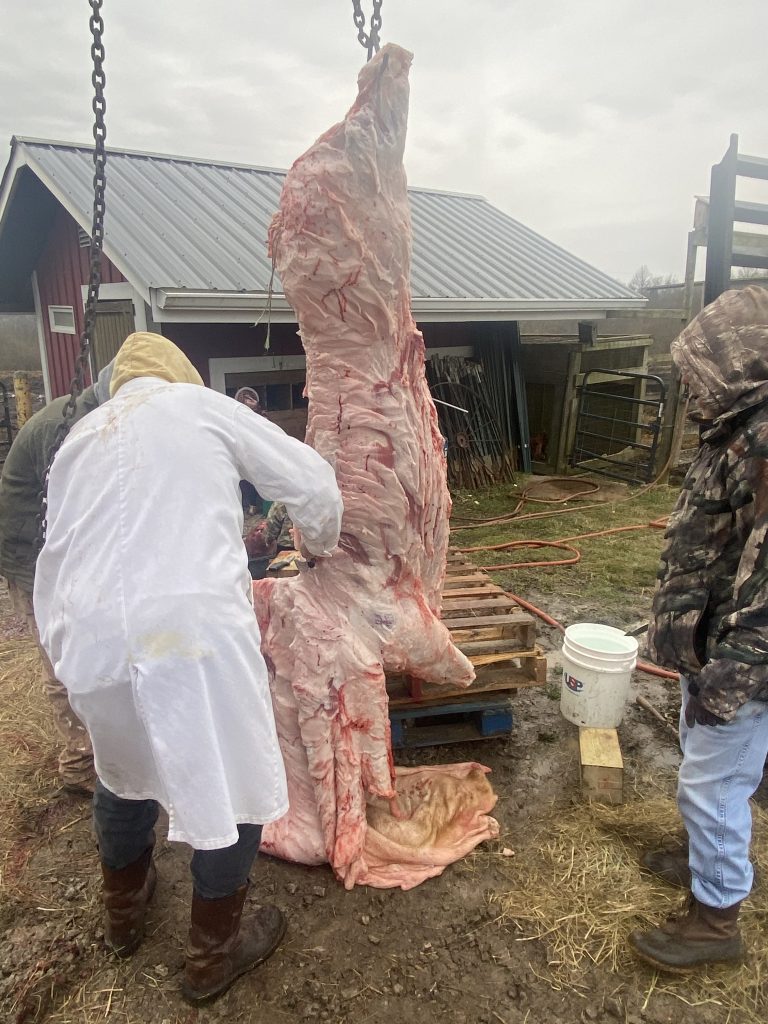
Note the short pieces of lumber on the stack of pallets/skids. They are used to hold the sow straight up on its back. Three skids high is a good working height.
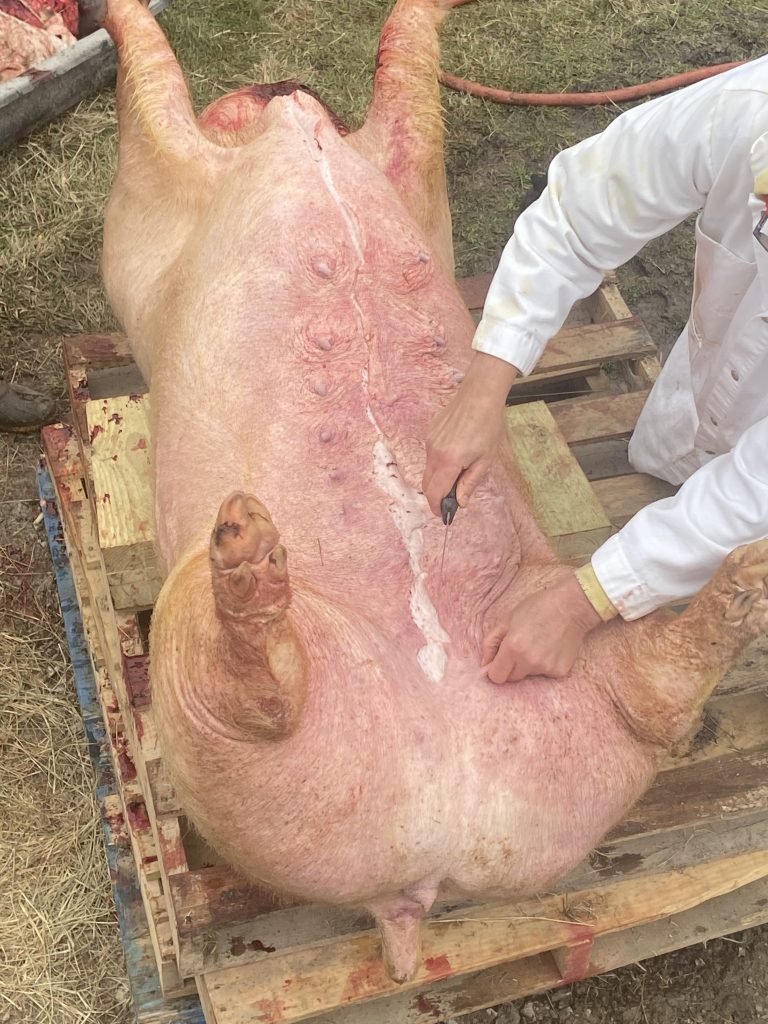
Start at the stick hole and cut down the ventral midline. Have a bucket or two of warm water on hand for rinsing off hands and knives. Change the water as needed.
Cut lines up to all four legs then have your assistants start skinning out the legs and up to the head. Meanwhile, use the skinning knife to skin-out the sides. Ride the skin closely as you go, or else you will start removing seams of fresh side (where bacon comes from).
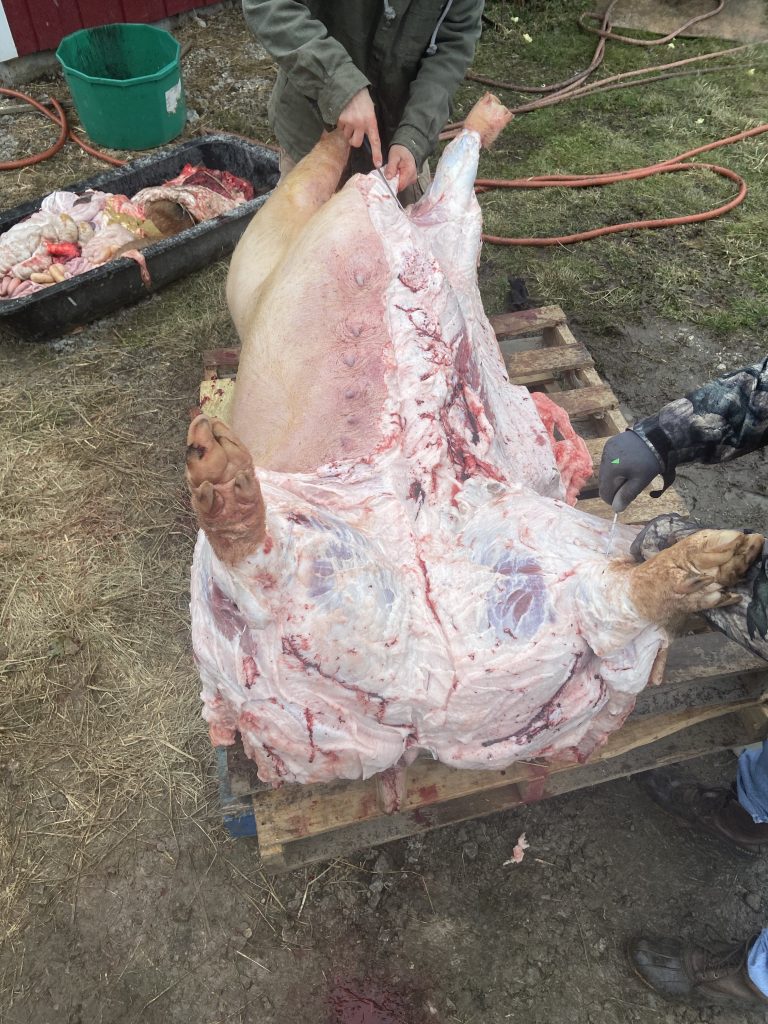
A practiced butcher can remove the head and feet with a knife. Use of a sawzall is not recommended, but if you are going to use one instead of a 25″ meat handsaw, use a wood blade. Leaving that knife on an unclean surface is not a sanitary practice either. I don’t like the paint on sawzall blades, the filth associated with the sawzall or the possible bone fragments generated by the wood blade. Metal sawzall blades clog up quickly; making bone hard to cut. The jowls were not kept for sausage production because they contain a lot of lymph nodes and unneeded extra fat.
When removing the hind feet, make sure to cut far enough back to leave the Achilles tendon well attached. A gambrel will be inserted through them to re- lift of the sow. Also at this point, hand saw all the way through the center of the breastbone. That procedure is needed to later facilitate complete gutting.
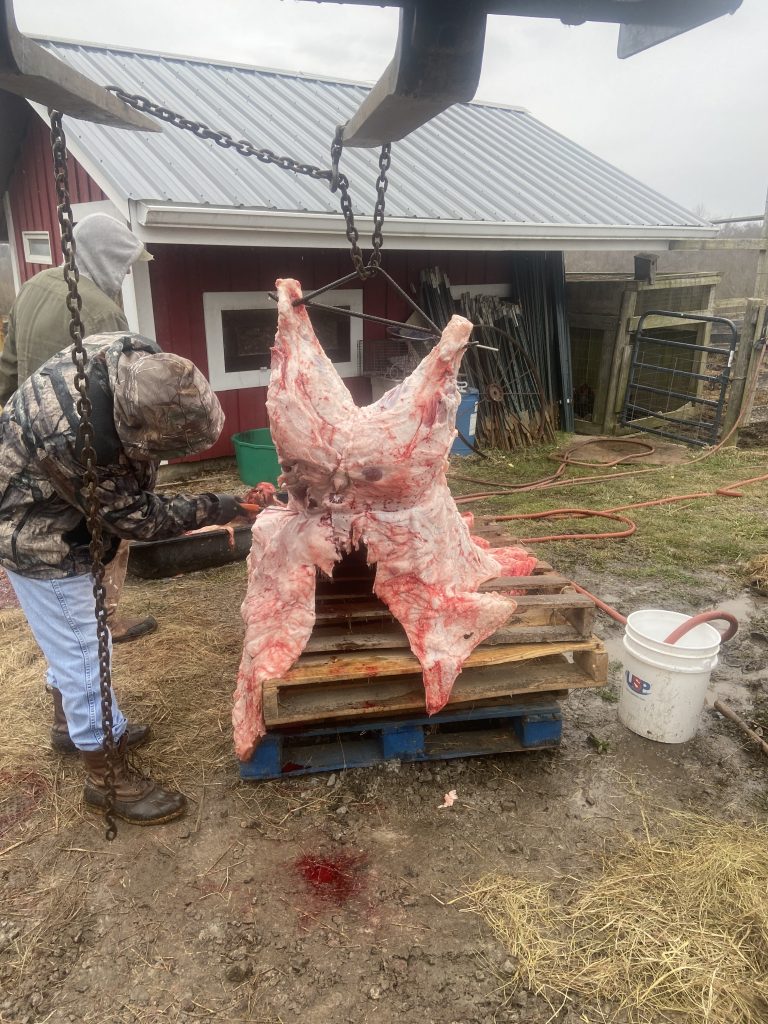
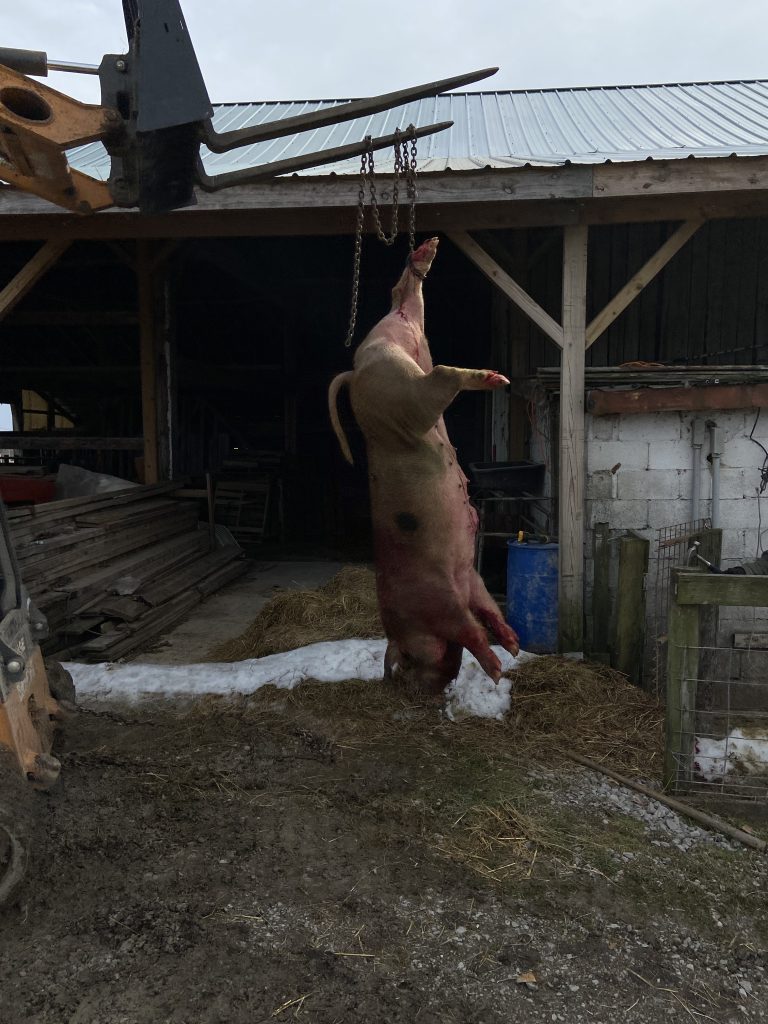
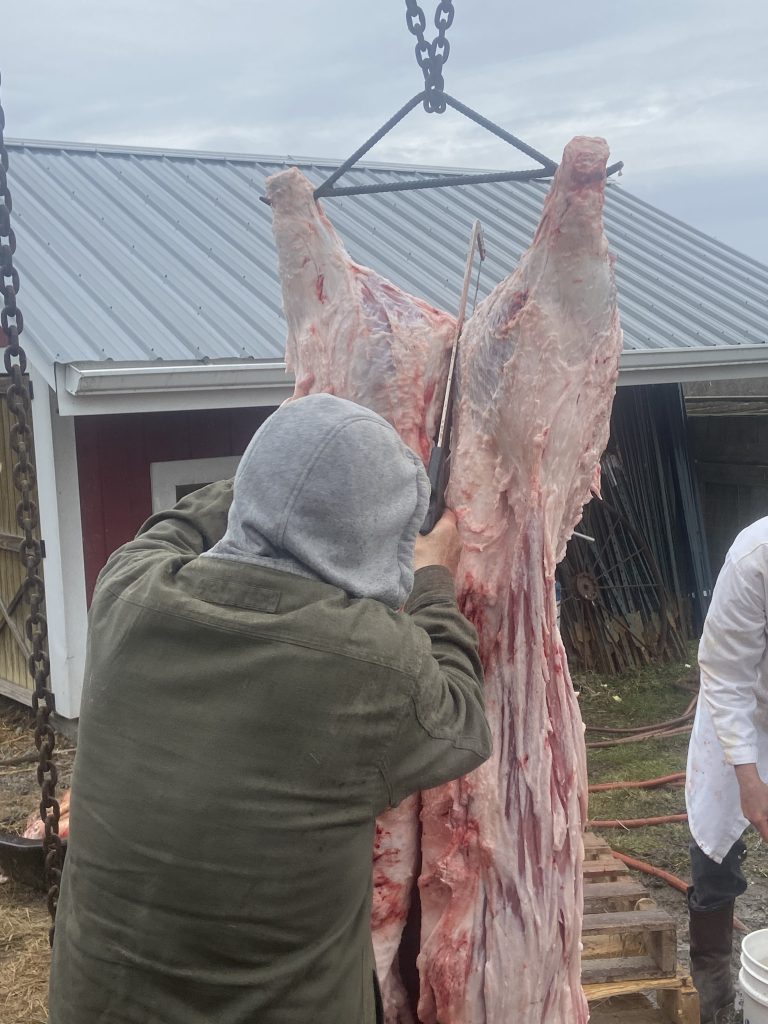
Insert the gambrile, raise the sow slightly and continue removing hide; while a lot of the weight continues to rest on the skids.

With a lot of the weight still on the skids, continue raising and hide dropping until the hams are up to about as high as your shoulder.
Temporally stop hide removal when the rear end is a comfortable height to bung it. It is OK to cut into the hams a little in order to assure that you are not cutting into anything that should not be cut into.
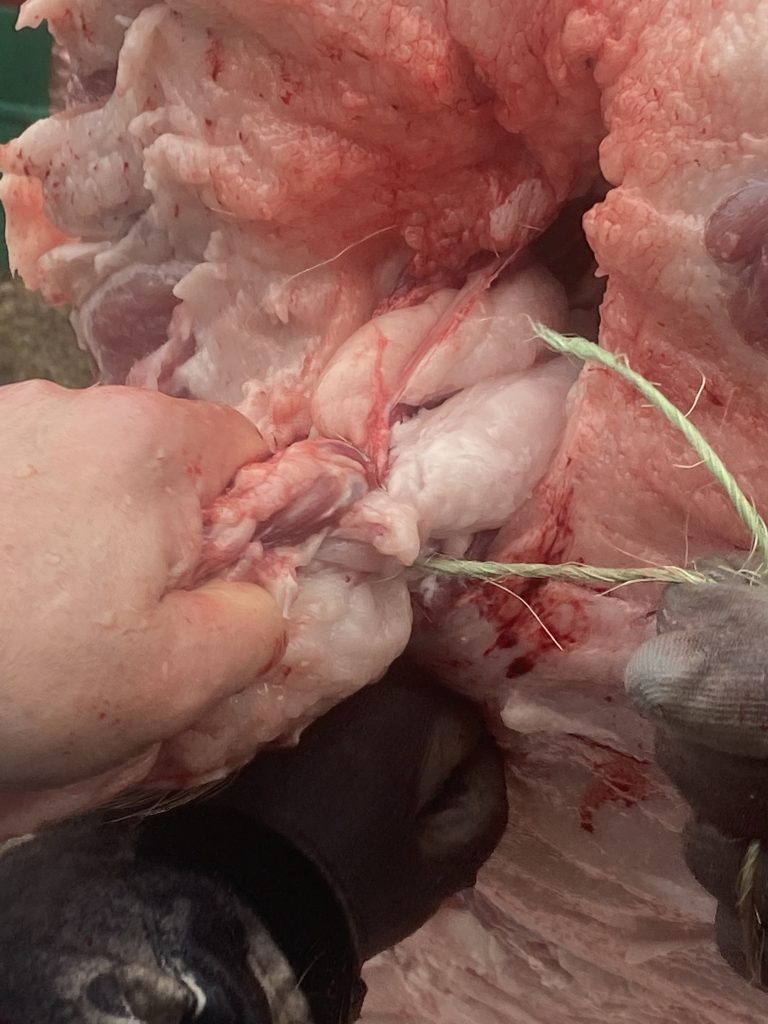
It’s a good practice to pull things out a bit and tie them off.
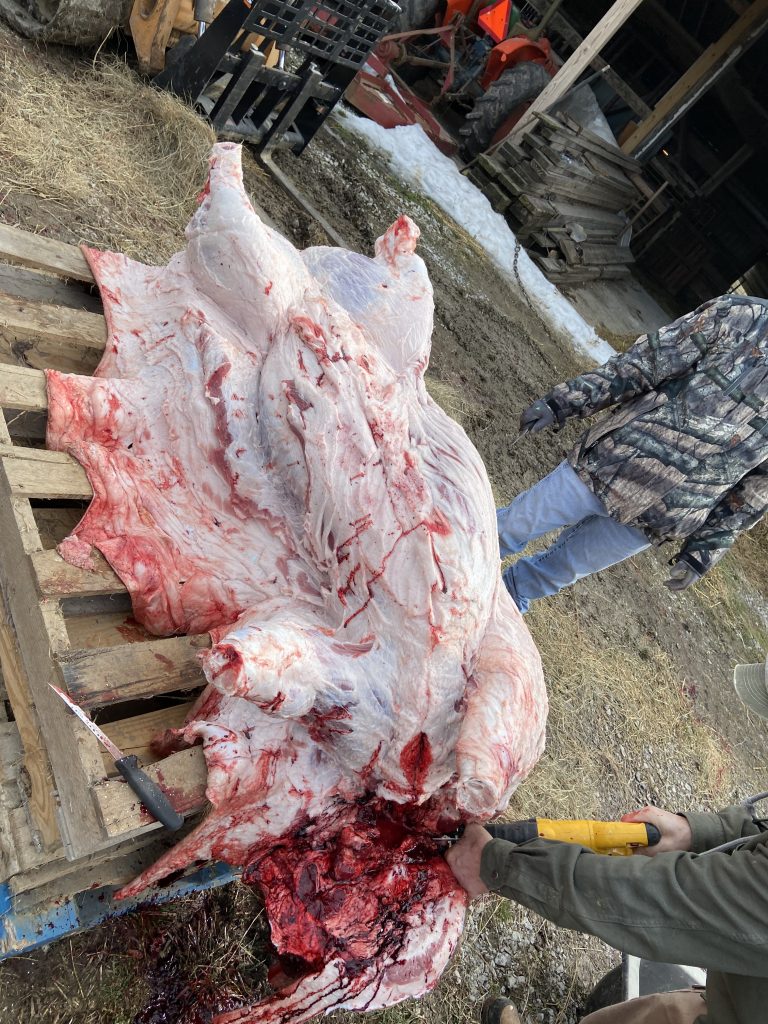
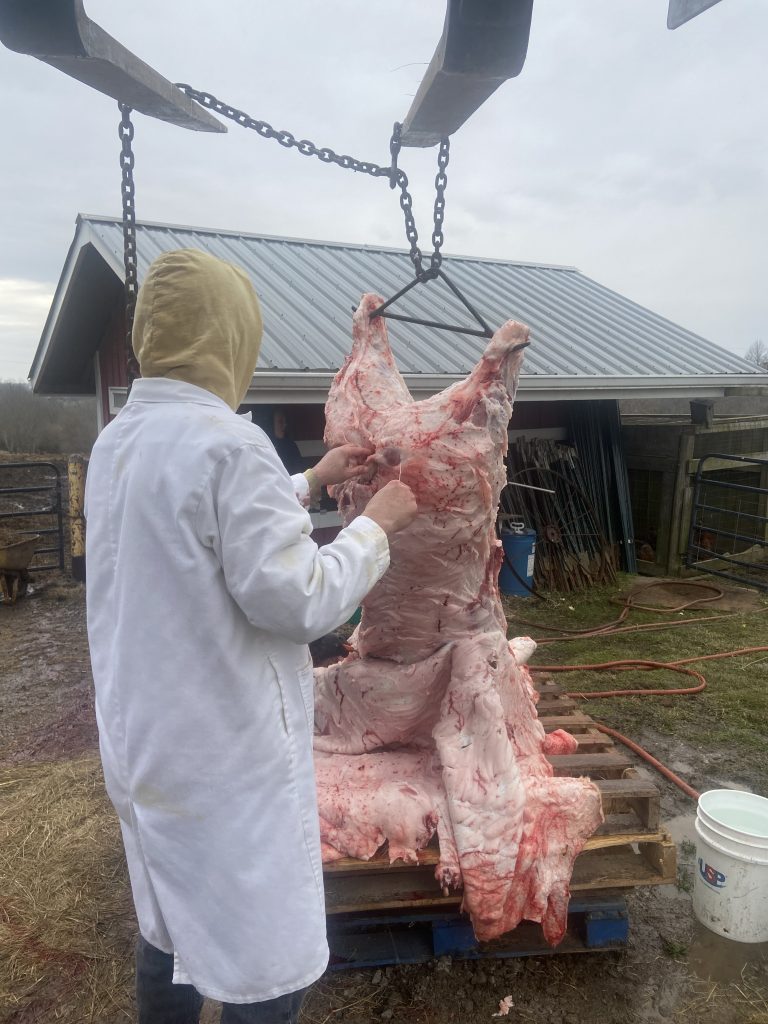
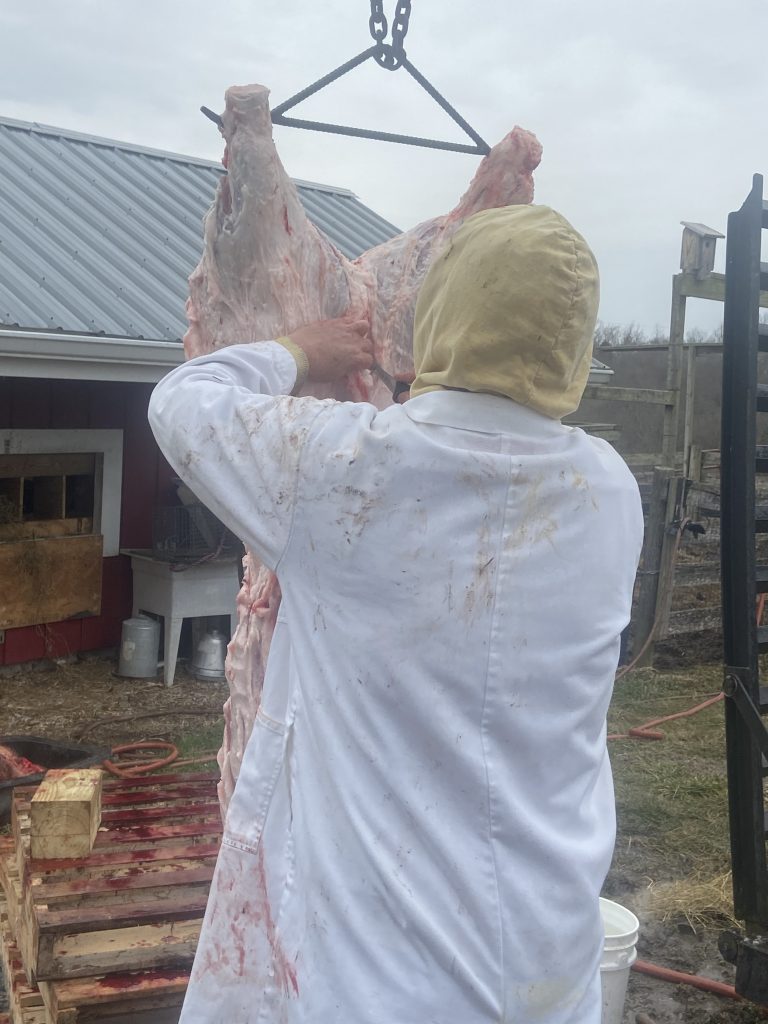
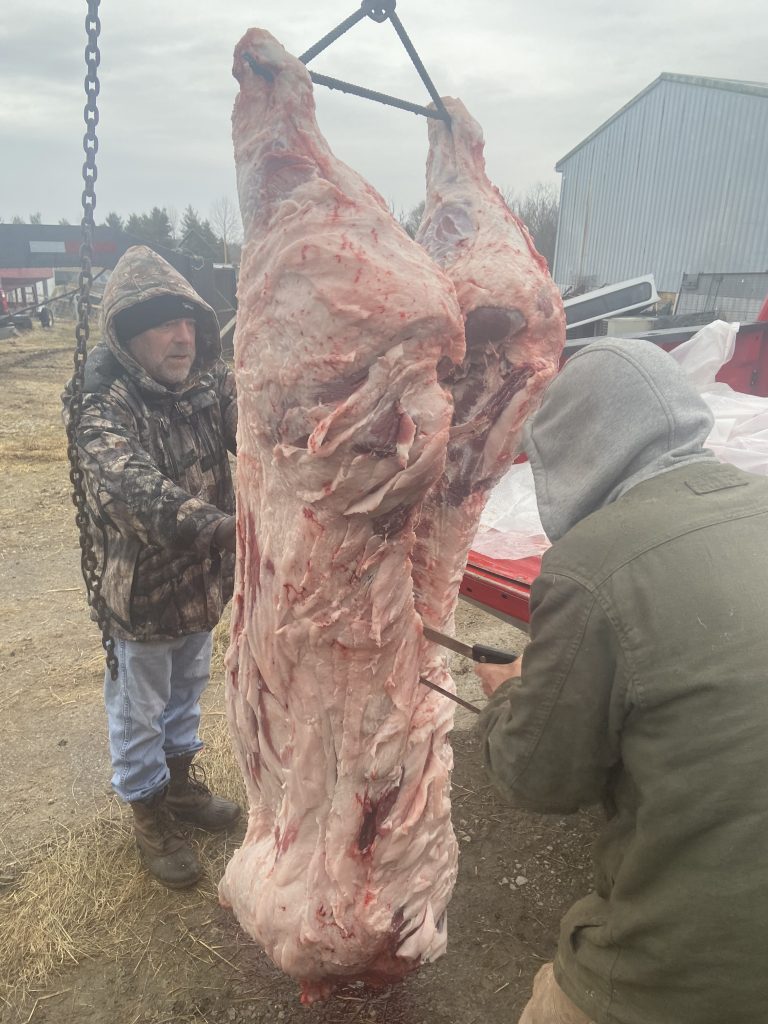
Continue raising the sow and dropping the hide. What is left of the hide is easy to pull off at this point. For safety, have a spotter to make sure that the remaining hanging weight remains secure.
With the hide fully dropped and the carcass swinging, cut into the midline between the hams until hitting the aitch bone. Also partially open up the remainder of he midline, but not to the point of freeing the guts.
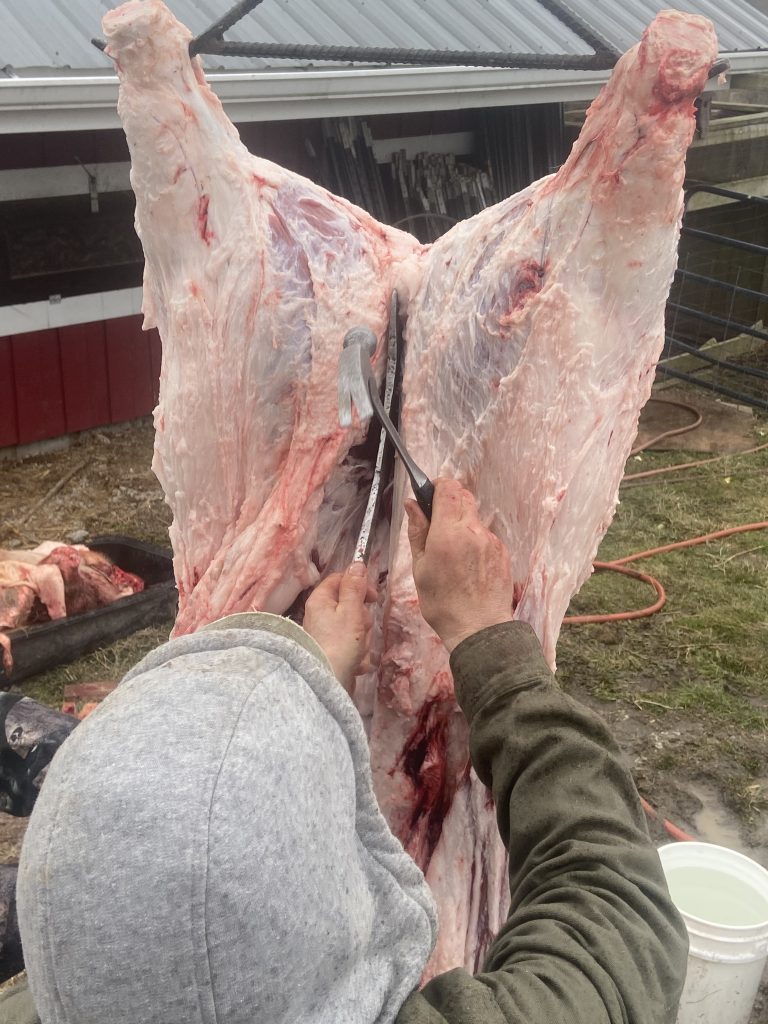
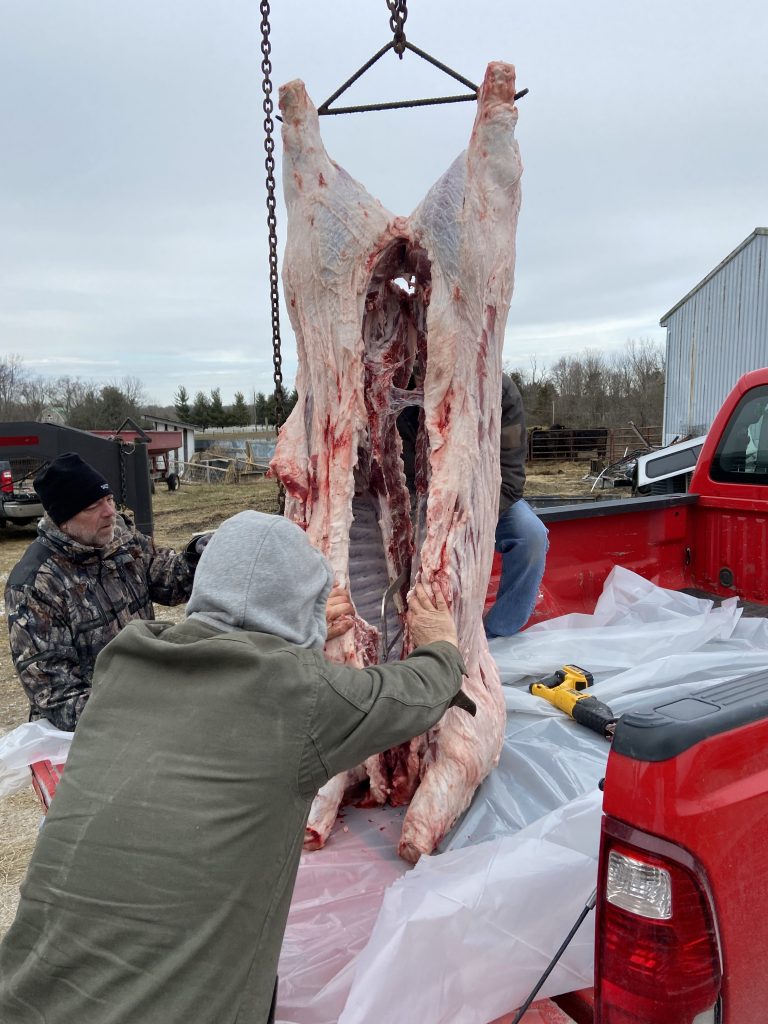
Hold the splitter on the center of the hipbone and hit the back of it with a hammer until it pops open.
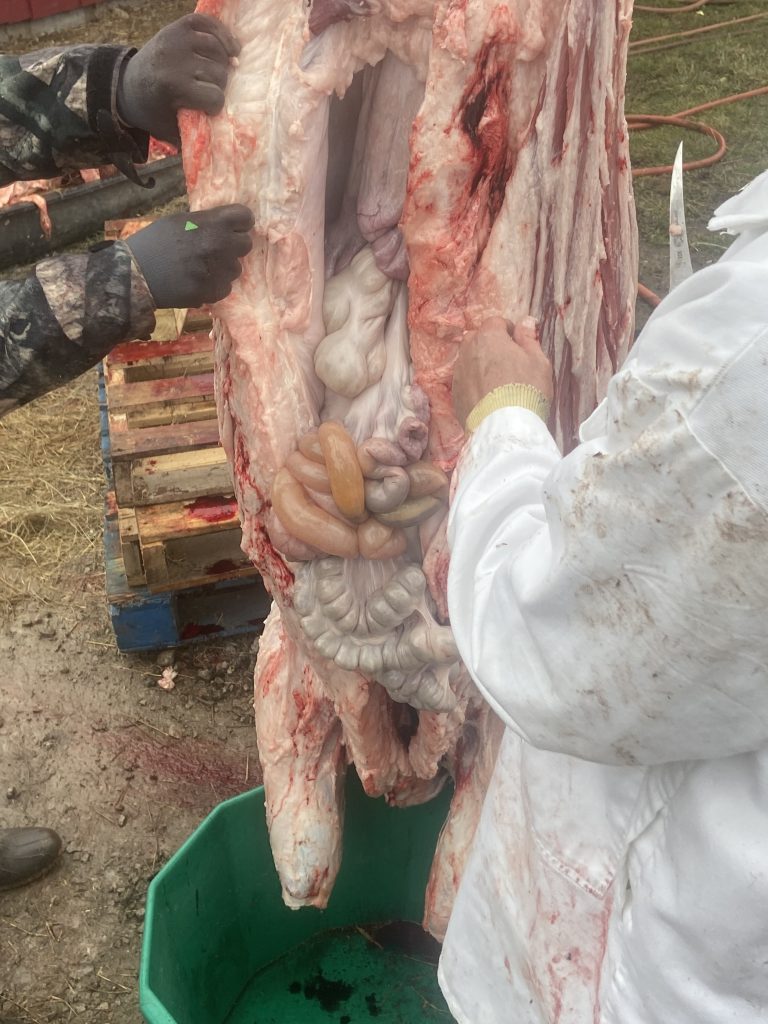
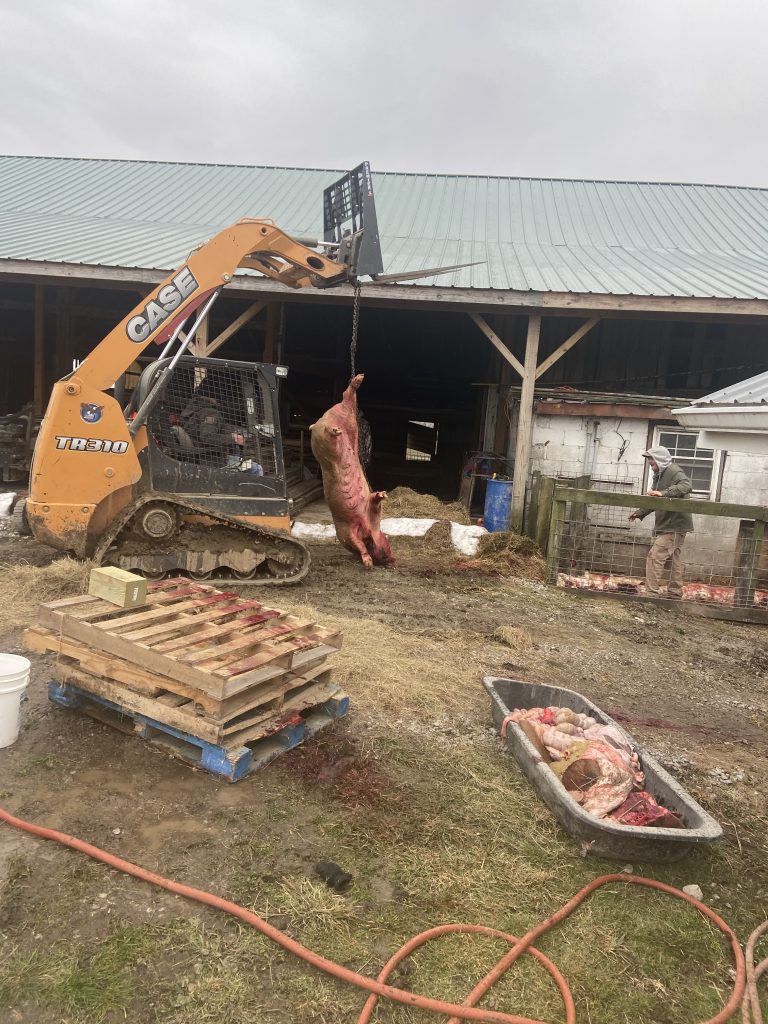
This sow had not been held off feed; so we had to be very carful not to pop any of the intestines as the midline was fully opened. Starting at the rear, pull down while cutting around the inside of the body cavity.
After the guts are dropped, start between the hams and saw the carcass into sides.
These two big sow carcasses were split and laid on clean new plastic in the back of a cold radiating truck bed to get well chilled overnight. Boning and sausage batching began the next morning. A lot of the remaining subcutaneous fat was trimmed off and made into soap. That surface trimming of fat helped remove possible unseen contamination.
Two posts this year! Keep it up!
I don’t have a barnyard but buy some local meat. I’m much happier with with local pork than local (grass fed, Select at Prime price) beef. Tasty pork vs the other white stuff.
Your pictures did a good job showing what has to be done without freaking out the somewhat squeamish me.
Thank you for your kind comments Dave. You are a man after my own heart. I will try to write more, but would like to know what people are interested in.
The other white stuff:
I’d take a chicken thigh over a boneless pork chop 90% of the time.
Sauted firm tofu last year. I could get used to it…
“..like to know what people are interested in.”
Continue to break down animals or boxed beef,
there’s been freezer explosion in the Covid era.
Now for me:
Locally, a lot of Prime beef appeared over the last coupula years.
Not in the chains, in independents. Locally packaged.
Steaks maybe $10/lb, a whole brisket $5/lb last week.
The USDA Prime shield on the package. It’s good, but Choice or CAB is good too.
I was used to $30 or so here for a Prime steak.
They did seem a bit better, too. Could be my imagination.
Thank you for the blog post ideas.
The best degree of marbling in a beef steak is a personal preference. It is undeniable that marbling adds to a, not overcooked, steak’s desirable flavor and juiciness. However, there can be too much of a good thing. For me, the optimal degree of marbling in market age beef is the high Choice range. CAB is at least in the upper two thirds of the USDA Choice marbling degrees and some CAB has Prime marbling degrees (and will be labeled Prime). CAB is a 10 factor carcass certification program; not an Official USDA beef grade. Especially when it comes to Wagyu, I think it can turn into a “keeping up with the Joneses” thing. The “fat is bad” paradigm has been disproven, but that does not mean that our preferences have to swing all the way in the opposite direction. If somebody will buy it, someone will sell it.