Why make fresh sausage? No cooking loss is taken prior to selling such product. Water is added to fresh sausage; while moisture is normally dehydrated from charcuterie type items (meat products are sold by the pound and super high prices can be a deal breaker). Fresh sausage is much simpler and less labor intensive to successfully produce than semi-dry or dry sausages. Pre-refrigeration technology meat products can yield potentially harmful substances from proteins breaking down and from fat oxidation. Fresh sausage production requires less equipment and supplies. The main downside to non pre-rigor fresh sausage is the short time after it is made before turning dark. Once dark it’s normally not going to sell. Immediately freezing can remedy that, but few people are currently accustomed to buying raw meat out of the freezer.
Last Tuesday I ordered a hank of 35 -38 mm diameter natural hog casings and 414 sausage phosphate form the Butcher & Packer Supply Company in Detroit, MI. The casings were slightly bigger around than what I have purchased in the past, but I wanted see if it made any difference in the eating enjoyment of the cooked Polish sausage. The sodium phosphate is listed in their catalog as Special Binder. Butcher & Packer also has good prices on bulk spices; I buy my leaf marjoram from them. But, I get roast sodium phosphate from The Ingredient Store; it goes by the name of Amesphos. Many worthwhile ingredients are easy to locate online.
The ordered supplies were on my doorstep when I got home from work on Thursday; so I started thinking about putting up a batch of coarse ground fresh Polish sausage for the Holidays, and for my nephew’s upcoming wedding reception. After work Friday I stopped by a Gordon Food Service store and found some “Natural” pork butts, which averaged 8 3/4 pounds each. They were $1.05 per pound as either a 2 pack or as a wholesale case containing four, 2 packs. Gordon’s does not charge a membership fee so I thought that I might get a better deal at the Sam’s Wholesale Club across the street; where we have a membership. The case price of Sam’s Natural butts was $1.19 per pound, however theirs were more closely trimmed; for cutting retail pork steaks or cooking whole. I prefer sausage to be around 20% fat so I went back to Gordon’s and bought a case of the lower priced butts. Even though the butts I purchased had been pumped and were only 94.3% pumped meat (after blade bone removal), $1.05 per retail outlet pound sounds pretty inexpensive in 2016. I recall driving to a downtown meat distributing & cattle harvest plant in the early 1980’s and paying around a dollar a pound for wholesale boxes of butts; which were not pumped or vacuum packaged. The salt-water enhanced low price of a high quality protein is a testament to the extraordinary meat producing ability of the modern hog and of best market hog production management practices. Using underutilized, inexpensive pork cuts can also make one feel as if they are supporting sustainable agriculture by way of adding great value to a less desired starting raw product.
Why pork shoulder butts: Readily available at retail outlets, higher collagen concentration in the more worked muscles adds richer flavor, seam fat between multiple smallish muscles increases fat content over easy to dry out modern hog loins, slightly cheaper than boneless loins (but meat may cost about the same after removing the approximately 1/2 pound each blade bones). Butts contain more dark colored meat than loins; which are mostly one muscle. Darker meat has a higher pH level; that’s why dark meat remains juicier after cooking. Picnics, fresh hind leg and bellies are primarily commercially further processed. Pork trimmings generated from further processing are not normally available at the retail level; plus carry a higher bacterial load and more objectionable material (lymph nodes, skin, bones, blood clots, bruises etc.) than sub primal meat cuts.
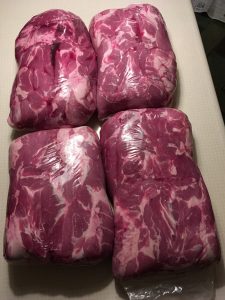
Eight bone-in pork butts that were meat plant enhanced with salt-water, and likely a natural microbial inhibitor such as lactic or citric acid. Salt and water are also considered natural, event though added above naturally occurring meat levels. Pumped percentage is unknown, but I’m guessing it’s around 10%. Cooked hams have “always” been allowed to go up to 10% above their green (raw) weight without being required to list “water added” on the product label. I made an guesstimate to cut recipe called-for salt & water amounts in half whenever using “natural” pork butts. {I now Natural buy boneless pork shoulder butts from Gordon’s Food Service. The price is competitive and I find less bone fragments in them. I think the meat plant “shotguns” out the blade bones then mechanically gleans the lean attached to them.}
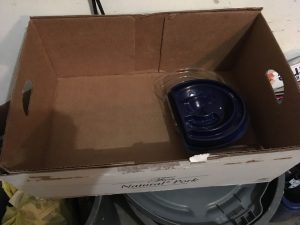
After cutting the top off of boxed pork carton the bottom makes a dandy disposable recycling bin.

Cutting board, butcher’s steel, a 5 inch curved boning knife and a 5 inch straight narrow blade boning knife.
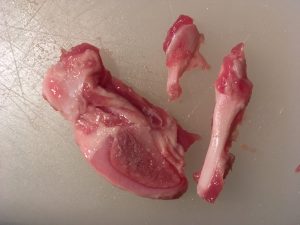
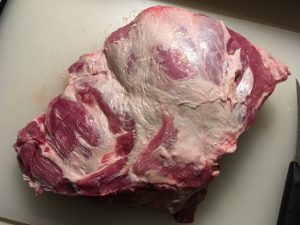
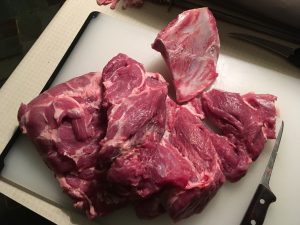
Work barehanded in order to feel for bone fragments on the exposed lean side; where they might have been left on butts during neck bone removal. Also feel fat side for bone-chips that may have gotten embedded in fat when butts were on the pork plant cut fabrication line. The pictured bone and bone-like material were all removed from the first butt worked up.
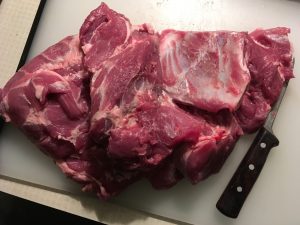
Cut off the subcutaneous (exterior) fat and associated thin muscles then place them in a separate trim container. If you look close you will see a lymph node at the tip of a knife in the upper left of this picture. It’s a best practice to remove and discard lymph nodes. Butts will only have one and in this location. However, in the case of the altar trimmed butts, like from Sam’s Club, lymph node are expected to have already been removed. One or two of the 8 butts from Gordon Food Service did not contain a lymph node; due to inconstant workmanship during wholesale cut fabrication.
Butt with heavy fat layer and thin muscles removed.
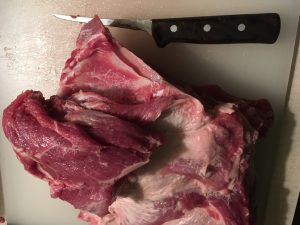
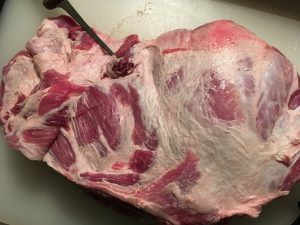
With the roast still laying with the animal’s outside up, locate the edge of the shoulder blade and cut along it to the base of the ridge of the scapula. Ride the knife along the bone then up to the ridge top.
Cut down the other side of the scapula ridge then across the flat part of the bone. After the entire bone is exposed cut shallowly around its perimeter.
Turn the roast over and cut along the flat side of the blade bone. Finally, cut through any meat that might still be attached to the edge of the bone and lift it out.
Removed blade bone is located in the upper right of this pic. Feel all around the pocket, where the blade bone was removed from for bone fragments/chips.
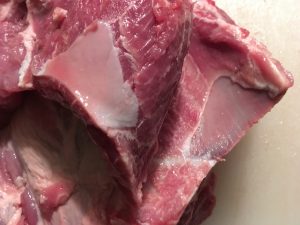
Bone-skin is sometimes left attached to lean along the sawed edge of blade bones. Remove and discard bone-skin as unpalatable material.
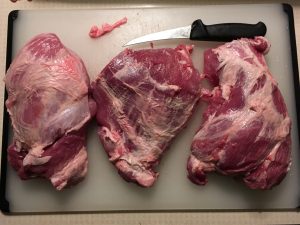
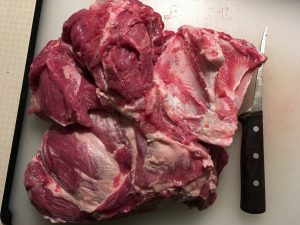
Muscle seams were followed in order to separate the boneless butt into three major parts. That practice simplifies heavy seam fat removal. Thick seam fat goes into the fat component bin for fine grinding. Strip up lean and put in a separate container. Throw out very thin, sloppy seam fat because it won’t grind well and will likely wrap around the grinder’s knife set and could cause less than clean cutting.

Trim out and throw out any blood clots or bruises because if they are ground unsightly red dots will be spread throughout the sausage batch.

Bone (other than the blade bone), lymph node and sloppy muscle bundle fat from the first pork roast. There were no bruises or blood clots found in the first butt.
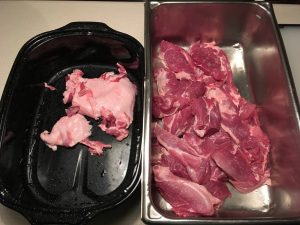
Fatter meat and lean from the first butt. Don’t get too carried away when separating fat and lean. Some fine ground lean is good for helping to slightly bind cooked sausage. And, fat left on lean, that’s not more than about an eighth of an inch thick, will render out enough to not be objectionable in finished cooked product.
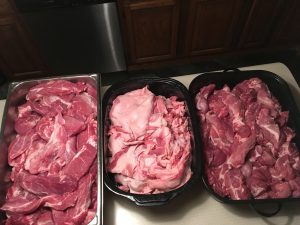
Lean meat component from all 8 butts is on both sides with fat component in the middle. Everything was cut into strips or chunks that were small enough to easily feed through the meat grinder. Marked net weight of wholesale case was 70 pounds. 4 3/4 pounds total was deemed inedible. When including a bag purge estimate of 3/4 of a pound, the total loss from marked case weight was 5 1/2 pounds. That left 64 1/2 pounds of enhanced, boneless starting raw product. All pork was then put into refrigeration while I moved on to other segments of the process.

Hank of casings spread out on kitchen island. This hank of 35 – 38 mm diameter casings was estimated to stuff an average of 115 pounds of product; so there was no need to flush and soak all of them for a 65 pound batch (non-meat ingredients also add a little weight and volume). I counted 12 casings near the ring end of the hank then used that info to estimate the need to prepare 7 of them. I sorted out 8 just of make sure, then tied the ring back on one end of the remainder and put those casings back in a bag.
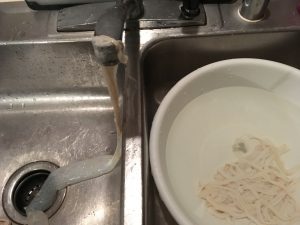
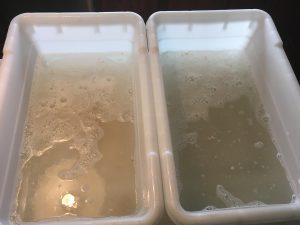
Put one end of a casing over the faucet and run a little water into it. Take the casing off the faucet and pull that end into a bowl of water; as water flushes through the inside of the entire casing.
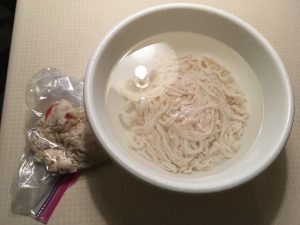
Bowl of flushed casings set aside until needed and the bag of casings heading back into refrigeration. Do you like the kitchen light reflection in the water?
Non-meat ingredients for a 65 pound Polish sausage batch: 18 3/4 Tbsp. leaf marjoram, 9 3/4 Tbsp. coarse ground black pepper, 39 cloves crushed garlic, 5 3/4 cups of liquid, 8 Tbsp. sausage sodium phosphate and 20 1/2 Tbsp. purified salt. Remember, water and salt were reduced by half due to using “Natural” raw pork. Cut the ends of garlic cloves then shake them hard in a closed container to greatly facilitate peeling. Or, chop them up, peel and all, in a food processor.
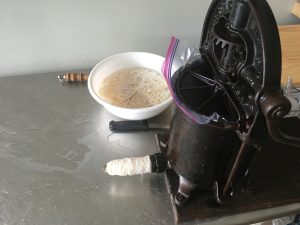
Boil water, marjoram, pepper and garlic all together in order to help sterilize bulk spices, take the “edge” off garlic and to help blend flavors. Stir in salt then chill the seasoning mixture.
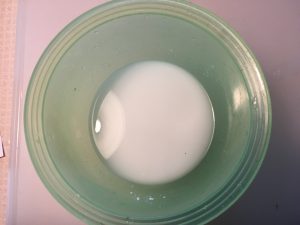
Sodium phosphate does not dissolve well in the presence of salt. So, dissolve sausage sodium phosphate in the remaining 3/4 cup of water, then lightly mix it into the meat first thing. If your starting raw meat label says anything other than Natural it likely already has sodium phosphate pumped into it; so don’t add more. If you read fresh product labels saying things such as Moist & Tender or Tender & Juicy, the ingredient statement most likely includes sodium phosphate.
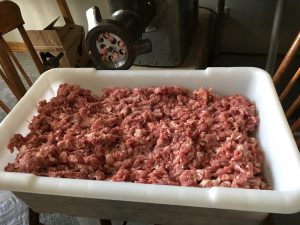
Lean component ground twice through a 3/4 inch hole size plate. {Since originally writing this post, I have switched to grinding half the lean once through the 3/4 inch plate and the other half of the lean twice.}
Fat component spread evenly on top of lean after going once through a 3/16 inch plate. Notice the halving line pressed into grind. A frozen hamburger bun was ground last in an effort to push most of the fat component out of the grinder head. Immediately after grinding meat was covered and place outside in the cold while the grinder was taken apart and rinsed off with warm water.
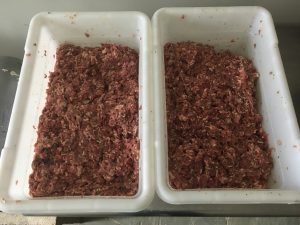
Meat back in the house with half of grind transferred into a second lug to facilitate hand mixing. I have a 17 pound capacity hand-crank meat mixer, but have deemed it to not be worthwhile due to how hard it is to get product in & out of it and it is fairly time consuming to clean.
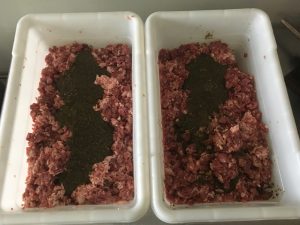
After a few minutes of hand mixing/fisting pour a nearly equal amount of spice blend into each lug. Use some of the grind to wipe out the seasoning pot.
Shows seasoning mixture blended in somewhat evenly in both lugs.
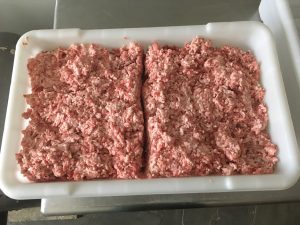
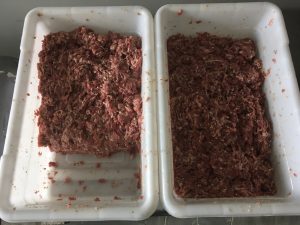
Throw everything back into one lug and make another center line.
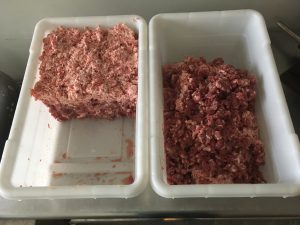
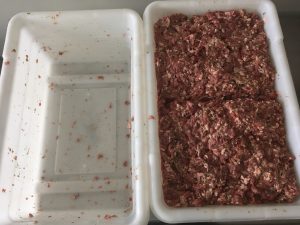
Half thrown back into another lug for more mixing. Left lug looks to contain more than half because by this point the mixture was loosing up and slumped forward when the other half was removed. Continue in this fashion until spices are well distributed and the batch becomes somewhat sticky.
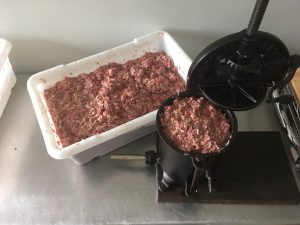
First stuffer load of sausage; after the well mixed batch was recombined into one lug.
The sausage containing lug outside in the cold and covered with another lug while stuffing got underway.
Dip a little water out of the casing bowl and into a casing then pull the casing onto the stuffer horn. A one gallon plastic bag was used to help seal the edges of the stuffer’s press plate.
An effort was made to tightly pack the stuffer, but some air will still get into casings during stuffing. Tapping the back edge of a knife blade on blown up casings, and against the metal stuffing horn, will create holes to release air pockets.
First coil; I had to refill the stuffer to finish out the casing.
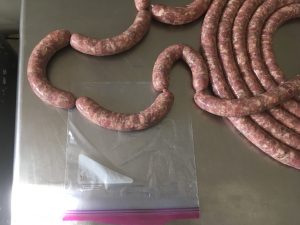
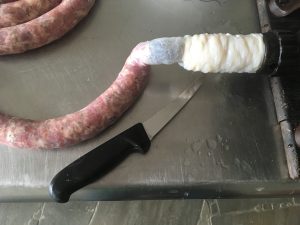
Using a one gallon freezer bag to measure link lengths.
First coil worked into 6 link sections; with casing ends tied in a knot. I like to cook 6 long links at a time. Notice bulk sausage on the table that was stripped from casing during the linking process.

6 link chains were placed in each gallon bag, rolled tight then sealed. These 5 bags were immediately spread out in the freezer then the stuffing process was continued. Salt increase the rate of fat oxidation. Besides increasing finished product moisture retention, inhibiting fat oxidation is another benefit of adding sodium phosphate. Cure (in this case partial curing from nitrate naturally contained leaf marjoram) also inhibits oxidation. Without the use of either of these two additives fat oxidation can rapidly lead to an objectionable warmed-over-flavor (WOF) in reheated meat products.
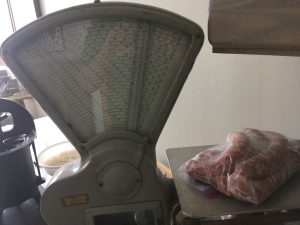
Each 6 link package weighed approximately 3 1/2 pounds; that’s just over 1/2 pound per long link.
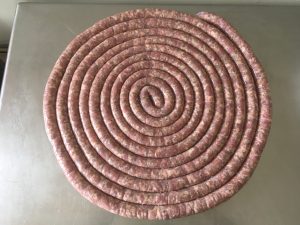
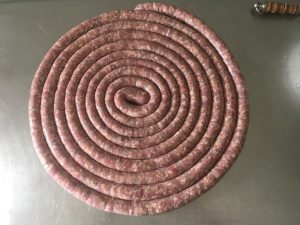
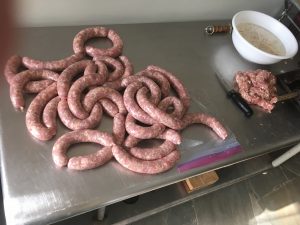
Another sausage coil for your viewing enjoyment.
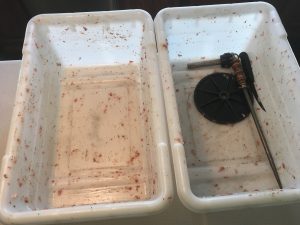
The optimal time to start cleanup is before sausage residue starts drying on containers and equipment.
Use warm water and dish soap. Too hot of water will cook meat protein fairly tightly onto affected surfaces.
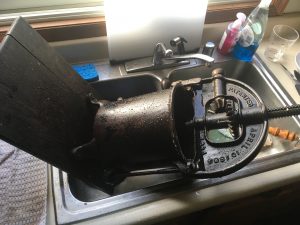
Stuffer partially in the kitchen sink to be rinsed out using the spray nozzle.

Less than 5 full lengths of casings were required to stuff 65 pounds. All remaining casings were drained of water and combined with the un-flushed portion of the hank; along with 8 tablespoons of purified salt, for freezer storage. I have heard not to freeze casings, but have never experienced any ill effects from doing so. Related note: I have never kept casings in freezer storage for much more than a year.
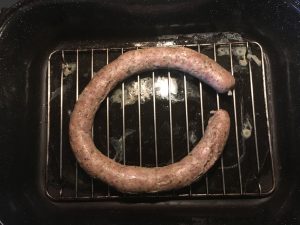
This little rope and about of cup of bulk sausage were leftover at the end of stuffing. I pated the bulk sausage into a glass container and oven cooked both the bulk and rope on a rack in a closed roasting pan at 225F for 1 1/2 hours. A rack keeps cooking cased sausage up out of liquid where seasoning flavor, water soluble protein, mineral & vitamin losses can add up to diminish both the eating enjoyment and the nutritional value of finish cooked meat items. Slow steam cooking facilitates the tenderization of both coarse pieces of lean and casings. I try to time it out to where sausage is removed from the heat when casings are just about ready to start splitting. That practice supplies an optimal mix of tenderness and eye-appeal.
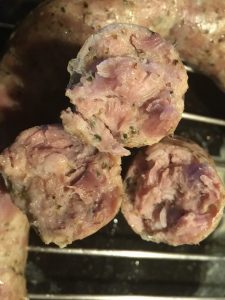
Three broken off pieces of coarse textured Polish sausage. It’s sort of like seasoned pulled-pork in a casing. Over time the nitrate naturally occurring in leaf marjoram converts to nitrite and can partially cure this sausage. If you follow the preceding cooking practice don’t worry about any pinkish sausage being undercooked; the internal temp will have reached well above 160F by the end of cooking. Collagen starts gelling rapidly in moist cooking environments and after reaching about 163F. When in doubt, always go by a calibrated meat thermometer because there is more than one reason why fully-cooked meat items can still appear pinkish.
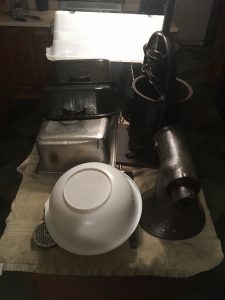
Final cleanup of containers and equipment. Grinder head and stuffer were rubbed with mineral oil the following morning.
The compliments make it worth making this sausage at least once year. When I get ambitious again I will work on a medium heat Italian version of this coarse textured fresh sausage; that contains a touch of garlic. I like spicy food, but a lot of the people that I cook for don’t so I aim for medium heat recipes and can add more spice at the table. The same philosophy can often be applied to salt levels and it doesn’t take much salt to achieve adequate bind in meat products. High lean and higher than needed salt levels will produce rubbery textured end-products.
Keep in mind that after developing a recipe you like, sausage production cleanup takes about the same amount of time no matter how much you make.
Example of batch size adjustment from the 65 meat pounds used here: For 17 pounds of meat divide 17 by 65 to obtain .262. Multiply each non-meat ingredient by .262 to find their new amounts.
One thought on “Fresh Sausage Tutorial”
Comments are closed.